Keycloak — Identity Provider
Keycloak — Your Gateway to Simplified Identity Management — Hello World! #keycloakSeries! — Episode 0
Welcome to Episode 0 of the #keycloakSeries!
Keycloak is an open-source Identity and Access Management (IAM) tool that helps secure services and applications by providing authentication.
In this hands-on tutorial, we’ll dive straight into running Keycloak locally, setting the stage for practical exploration. Our approach is simple: install Keycloak, spin it up, and connect it to a basic Node.js app to get familiar with its essentials. Throughout this series, we’ll focus on practical implementations while shedding light on the key theoretical concepts that make it all work. By the end, you’ll be equipped to seamlessly manage authentication and authorization in your applications.
At the very end, you’ll find a video to help you get started quickly :)
Let’s get started!
Note: if you get stuck, please see my repo.
Running Keycloak locally is straightforward.
Here’s a step-by-step guide:
0 Step — Execute this docker command:
My System:

OS: Ubuntu 24.04 LTS
Processor: Intel® Core™ i7–9750H × 12 — 8.0 GiB RAM

docker -v
Docker version 27.3.1, build ce12230
sudo docker network create demo-networksudo docker run -d --name keycloak --network demo-network -p 8080:8080 -e KC_BOOTSTRAP_ADMIN_USERNAME=admin -e KC_BOOTSTRAP_ADMIN_PASSWORD=admin quay.io/keycloak/keycloak:latest start-devFirst, we will create a demo-network and execute the Keycloak command within it. This will pull the Keycloak image, start the server in the background, and initialize the Keycloak service. As the server starts, you’ll see it progress through the setup process.

1 Step — Point your browser to:
http://localhost:8080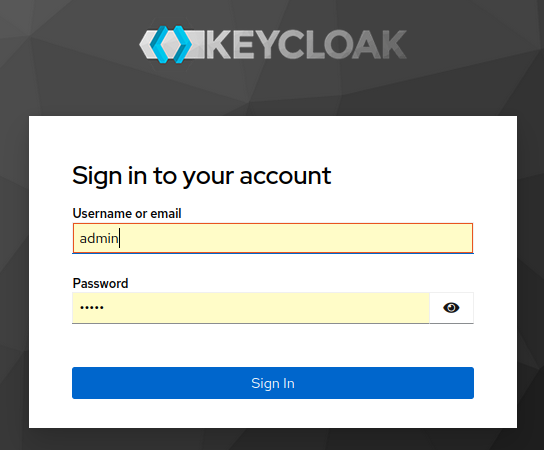
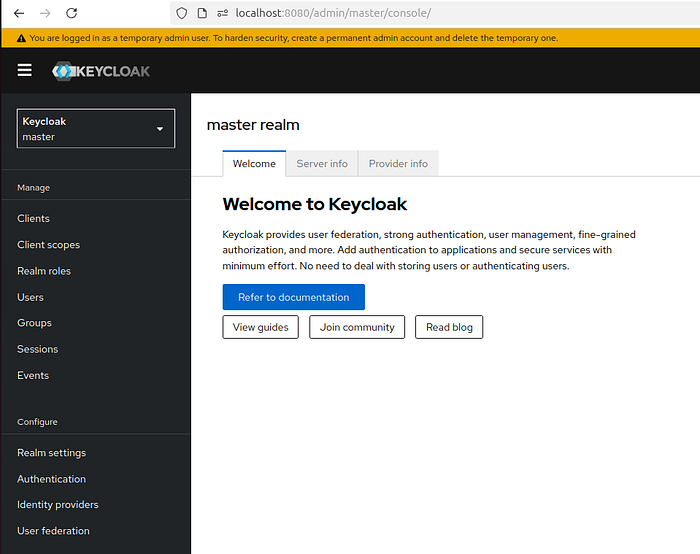
admin, admin; If you close your terminal, simply run: docker start keycloakOnce fully initialized, you can access the Keycloak Admin UI to begin managing your configurations.
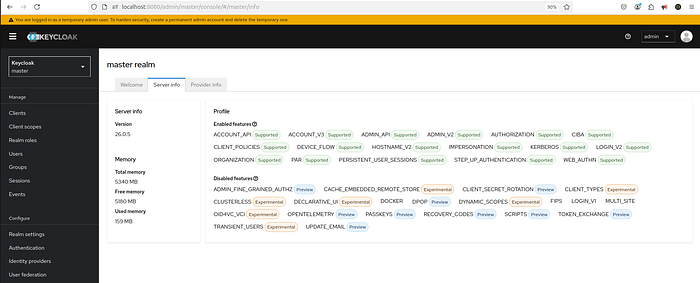
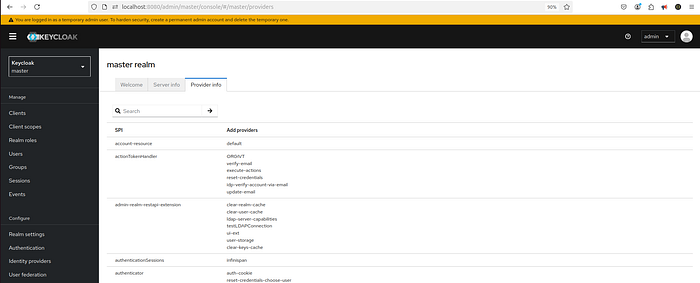
In Keycloak, SPI stands for Service Provider Interface. It represents an extension point in Keycloak that allows developers to customize or extend its behavior by implementing their own providers.
What SPI Means in the Provider Info Tab:
- SPI Name: Identifies the type of service being extended (e.g.,
authenticator,user storage,event listener); - Provider: The implementation of the SPI. Keycloak includes several built-in providers, but you can also create custom ones to suit specific requirements;
Practical Use of SPI:
- SPIs allow you to plug in custom logic where Keycloak’s built-in features might not suffice;
For example, you can:
- Create a custom Authenticator to define how users authenticate;
- Develop a User Storage Provider to connect Keycloak to an external database;
- Implement an Event Listener to respond to user-related events.
The Provider Info Tab in the Admin Console helps you see which SPIs and their associated providers are available or active in your Keycloak instance. This is useful for troubleshooting and extending the platform.
2 Step — Node App Installation Guide
Follow these steps to set up the vscode Node App project locally on your machine: Prerequisites
Make sure you have the following installed:
Node.js (v14 or later)
npm (Node Package Manager, comes with Node.js)
Git (for cloning the repository)
docker (v27 or later)
vscode (v 1.95.3 or later)
keycloak (v26 or later)
mkdir keycloak
cd keycloakClone the Repository:
Open your terminal and run the following command to clone the repository:
git clone https://github.com/giljr/keycloak_project.gitChange your directory to the cloned project & start vscode:
cd keycloak_project/nodejs/resource-server
code .
exit
Install Dependencies:
Run the following command to install the required dependencies:
npm install
npm install keycloak-connect express-session
3 Step — Start by introducing yourself and getting acquainted:
keycloak/keycloak_project/nodejs/resource-server/package.json
{
    "name": "keycloak-resource-server",
    "type": "module",
    "scripts": {
      "start": "node app.js"

    },
    "dependencies": {
      "@keycloak/keycloak-admin-client": "26.0.5",
      "express": "^4.18.2",
      "keycloak-connect": "26.0.5"
    },
    "devDependencies": {
      "keycloak-request-token": "^0.1.0"
    }
  }
4 Step —Start by introducing yourself and getting acquainted:
nodejs/resource-server/keycloak.json:
{
  "realm": "quickstart",
  "auth-server-url": "http://127.0.0.1:8080",
  "ssl-required": "external",
  "resource": "test-cli",
  "public-client": true,
  "confidential-port": 0
}
5 Step — Access keycloak Application on http://localhost:8080/:
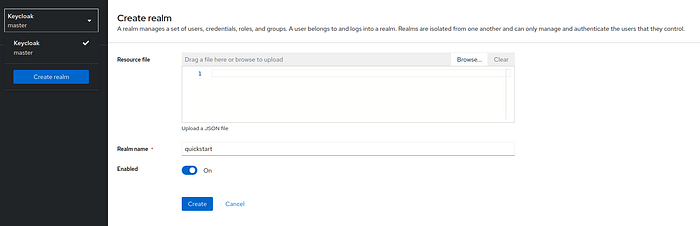
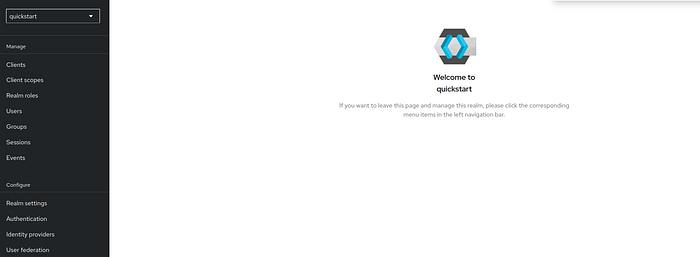
Create new Realm: quickstart
6 Step — In vscode, Explore
nodejs/resource-server/app.js
import express from 'express';
import Keycloak from 'keycloak-connect';
const app = express();
const port = 3000;
// Middleware configuration loaded from keycloak.json file.
const keycloak = new Keycloak({});
app.use(keycloak.middleware());
app.get('/public', (req, res) => {
res.json({message: 'public'});
});
app.get('/secured', keycloak.protect('realm:user'), (req, res) => {
res.json({message: 'secured'});
});
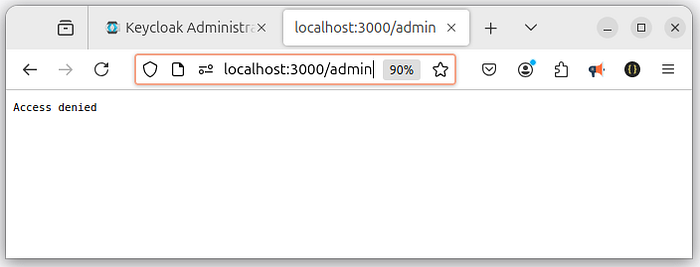
app.get('/admin', keycloak.protect('realm:admin'), (req, res) => {
res.json({message: 'admin'});
});
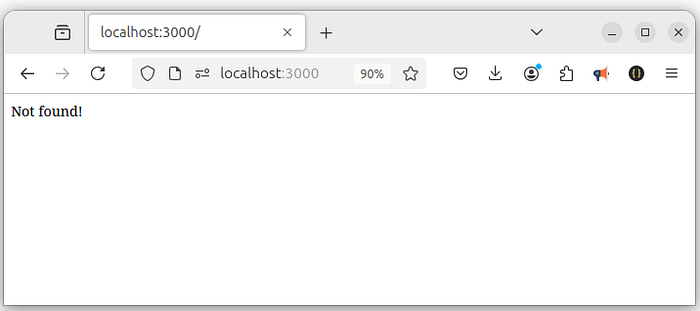
app.use('*', (req, res) => {
res.send('Not found!');
});
app.listen(port, () => {
console.log(`Listening on port ${port}.`);
});This Express application integrates Keycloak for authentication and authorization, offering three distinct endpoints:
/public:
Access: Open to everyone, no authentication required.
Response: A JSON message {message: 'public'}./secured:
Access: Restricted to users with the 'user' role in the realm.
Middleware: Uses keycloak.protect('realm:user') to enforce role-based access.
Response: A JSON message {message: 'secured'} for authorized users./admin:
Access: Restricted to users with the 'admin' role in the realm.
Middleware: Uses keycloak.protect('realm:admin') to enforce role-based access.
Response: A JSON message {message: 'admin'} for authorized users.
Default Route (*):
Access: Catches all other undefined routes.
Response: Returns a 'Not found!' message.
Key Highlights:
keycloak.middleware(): Sets up the Keycloak middleware to handle authentication flows.Role Protection:keycloak.protect()ensures access control based on roles assigned to users in Keycloak.Port: The app listens on port3000.
Our setup is designed to be as simple as possible. Our Node app v.0 configures Keycloak solely within the middleware filter, loading a .json file for its configuration. This follows a Direct Access Grant flow. We'll delve deeper into flows in future discussions. Note that we do not enforce HTTPS, which operates as the front channel in this context.
This setup provides a foundation for securing your routes with Keycloak in an Express application.
7 Step — Return to keycloak, Inside quickstart Realm let’s create first a client to our node app.
test-cli

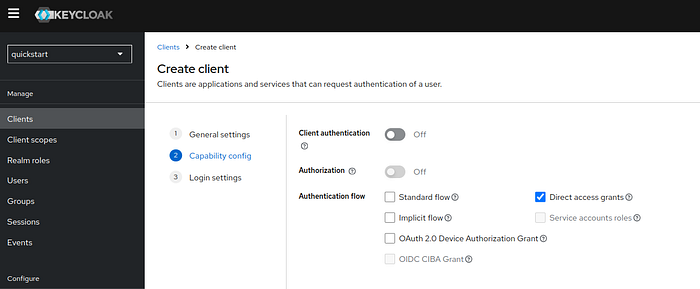

http://localhost:3000 ; Save the changes.8 Step —Back to vscode — Start your app. Make sure you are in the right directory:
cd keycloak_project/nodejs/resource-server
Type:
node app.js
9 Step — Test your endpoints:
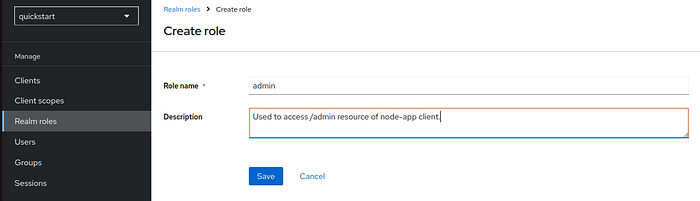
10 Step — In keycloak dashboard, Create new Roles
Navigate to Realm roles under your realm.
- Add two roles:
userandadmin.

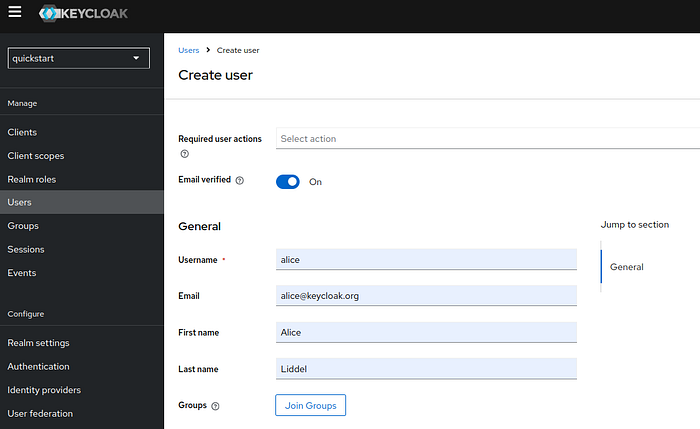
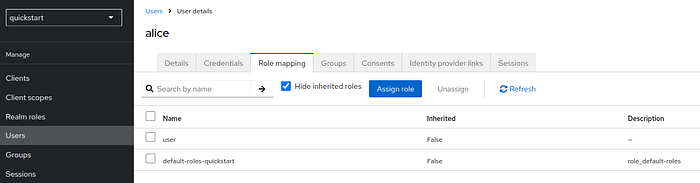
11 Step — Create Users, Set Credentials, and Assign Roles
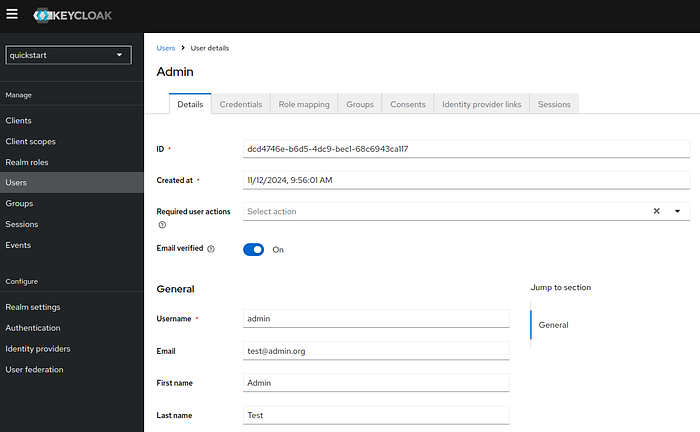
Go to Users and add two users (e.g., alice and admin).
Assign roles to the users:
- Assign the
alicerole touser. - Assign the
adminrole toadmin.


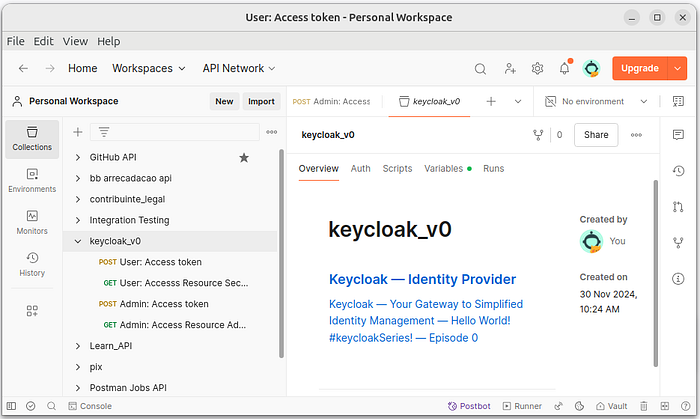
12 Step —Open Postman and import this json keycloak project now.
You can download my custom collection for free! Simply click the link, open Postman, click Import, and select the .json file. That’s it — you’re all set!
keycloak_v0.postman_collection.json
The user interacts with Keycloak by sending a POST request with their credentials to obtain an access token. This token is then used to make a GET request to access private resources. For this demonstration, we will use Postman.
For a comprehensive guide on Postman, check out this tutorial from freeCodeCamp: Postman Beginner’s Course — API Testing.
13 Step — Open the URL to User: Access token:
POST http://127.0.0.1:8080/realms/quickstart/protocol/openid-connect/tokenBody:
Select the Body tab, and choose x-www-form-urlencoded.
Add the following parameters:
client_idwith valuetest-cliusernamewith valuealicepasswordwith value123grant_typewith valuepassword
Send the Request:
- Click Send to submit the request.
Extract the Access Token:
- The response should contain a JSON object. Look for
access_tokenin the response body.
To view the access_token directly in Postman’s response, you can create a test script in the Scripts tab:
let jsonData = pm.response.json();
pm.environment.set("access_token", jsonData.access_token);
This script saves the access_token to an environment variable named access_token in Postman, which you can then use in subsequent requests.
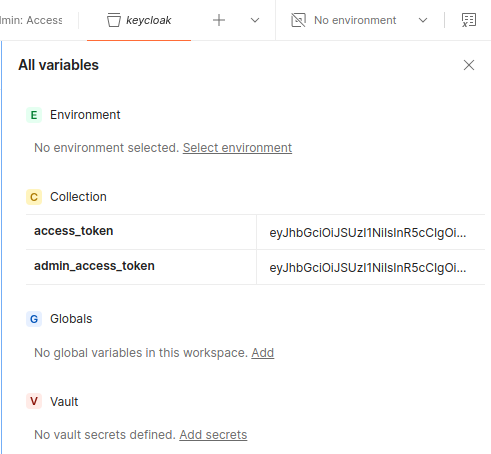
access_token and admin_access_token are already define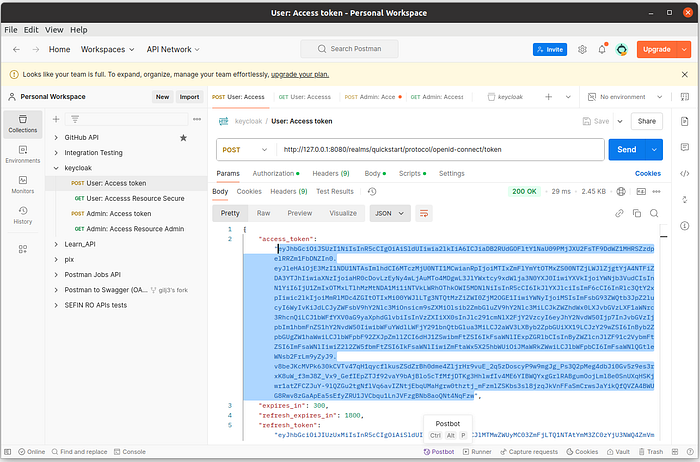
access_token into https://jwt.io/
14 Step — Open the URL to User: Access Resource Secure:
GET http://127.0.0.1:3000/securedAuthorization:
Select Bearer Token
Token: {{access_token}}
15 Step — Open the URL to Admin: Access token:
POST http://127.0.0.1:8080/realms/quickstart/protocol/openid-connect/tokenBody:
Select the Body tab, and choose x-www-form-urlencoded.
Add the following parameters:
client_idwith valuetest-cliusernamewith valueadminpasswordwith value123grant_typewith valuepassword
Send the Request:
- Click Send to submit the request.
Extract the Access Token:
- The response should contain a JSON object. Look for
access_tokenin the response body.
To view the access_token directly in Postman’s response, you can create a test script in the Scripts tab:
let jsonData = pm.response.json();
pm.collectionVariables.set("admin_access_token", jsonData.access_token);
This script saves the admin_access_token to an environment variable named admin_access_token in Postman, which you can then use in subsequent requests.
16 Step — Open the URL to Admin: Access Resource Secure:
GET http://127.0.0.1:3000/adminAuthorization:
Select Bearer Token
Token: {{admin_access_token}}
17 Step — Newman — visit: https://www.npmjs.com/package/newman#html-reporter
In your terminal, execute the following command, specifying the path to the JSON file:
npm install -g newman
npm install -g newman-reporter-htmlextra
newman run keycloak.postman_collection.json --reporters cli,htmlextra
keycloak-2024–11–25–16–53–08–844–0.html —Take a moment to explore this stunning report!
Using Keycloak, with OAuth 2.0 and OpenID Connect protocols, centralizes user login, meaning only one place and one team are responsible for securing passwords. This reduces the attack surface of your system. If users log in across multiple apps, attackers have more opportunities to steal passwords. Centralizing login also makes it easier to implement additional security measures, like multi-factor authentication, in one place. That’s why using OAuth 2.0 for everything makes sense.
That all folks!
See you in the next Keycloak episode.
Bye!
👉 Node App V.0 Driver Files
👉Node App V.0 GitHub Repo
Related Posts
0 # Epi # keycloakSeries! — Keycloak — Identity Provider Keycloak — Your Gateway to Simplified Identity Management — Hello World! (this one)
1 # Epi # keycloakSeries! — Why Choose Keycloak? Understanding the Need for an Identity Provider (IdP) and IAM with OAuth & OpenID Connect
2 # Epi # keycloakSeries! — Keycloak and MailHog — Exploring Email Sending, User Self Registration, Custom, and Attributes
Note0:
Error during Keycloak setup: No variable set:
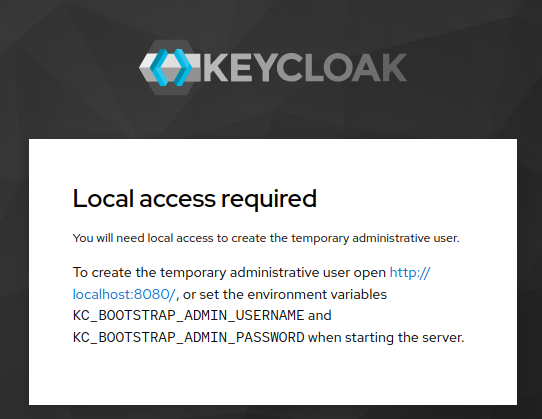
Fix the issue by removing Keycloak and reinstalling it using the correct command: Step 0:
docker rm -f keycloak#[Removing all]:
#[stopping keycloak]
docker stop keycloak
#[Removing container keycloak]
docker rm keycloak
#[Removing images]
docker image ls
docker image rm bcd9
clear
docker ps -aNote1:
What is a WebAuthn Authenticator, and does Keycloak support it?
WebAuthn (Web Authentication) is a web standard that allows users to authenticate to applications using secure, cryptographic keys instead of traditional passwords. It’s part of the FIDO2 (Fast Identity Online) framework and is supported by major browsers and devices, enabling secure passwordless or second-factor authentication.
How WebAuthn Works
Registration: When a user registers with a WebAuthn-enabled app, the app prompts the user to use a WebAuthn Authenticator (like a fingerprint scanner, face recognition, or security key). The authenticator generates a unique public-private key pair for that site. The app stores the public key, while the private key remains securely stored on the authenticator.
Authentication: When the user wants to log in, the app asks the authenticator to cryptographically sign a challenge using the private key. This signature, verified by the public key stored on the server, ensures the user’s identity without needing a password.
Types of WebAuthn Authenticators
WebAuthn supports two main types of authenticators:
Platform Authenticators: These are built into the user’s device, like Face ID or Touch ID on a smartphone or Windows Hello on a PC.
Roaming Authenticators: These are external devices, such as USB, NFC, or Bluetooth security keys (e.g., YubiKey).
Key Advantages
Stronger Security: Eliminates the need for passwords, reducing risks of phishing and credential theft.
Improved User Experience: Users can authenticate with biometrics or a security key, which is faster and easier.
Phishing Resistance: Since WebAuthn is domain-bound, it prevents credentials from being used on unauthorized sites.
WebAuthn with Keycloak
Keycloak supports WebAuthn as an authentication option, allowing applications to offer passwordless or multi-factor login flows using WebAuthn-enabled devices.
Note2
Keycloak utilizes UMA (User-Managed Access). But what exactly is UMA, and how can you take advantage of it?
User-Managed Access (UMA) is an authorization protocol under OAuth 2.0 that allows users to manage access to their resources. In Keycloak, UMA enables resource owners to set permissions and define policies for how their resources can be accessed by others, using a centralized authorization server.
With UMA in Keycloak, you can:
Create fine-grained access policies for resources (e.g., documents, files).
Allow users to control who can access their data.
Enable secure delegation and access control without exposing sensitive information.
This is particularly useful for applications that need resource-sharing features, like shared documents or files in collaborative platforms.
Note3:
What is FreeOTP?
When using FreeOTP with Keycloak or similar identity providers, the “Device Name” refers to a user-defined label for the device where you’re setting up the two-factor authentication. This name helps you identify the device in your account settings, particularly if you have multiple devices registered for two-factor authentication.
Here’s how you can set it up:
Choose a Name for Your Device: If prompted, type in a name that you can easily recognize, like “My Phone,” “Work Tablet,” or “Personal iPad.” This name is purely for your reference.
Setting the Device Name in Keycloak: When adding FreeOTP or any OTP (One-Time Password) device in Keycloak, it should prompt you to enter this name. You’ll typically be able to view this device name later in Keycloak’s Account Console under Two-Factor Authentication or similar security settings.
If Keycloak or FreeOTP doesn’t automatically prompt you for a device name during setup, check your account’s Security Settings or Two-Factor Authentication section, where you might have the option to label or rename your device after initial setup. This name is not generated automatically by FreeOTP but is rather a custom label you create to identify your device.
Note4:
When I create a Client, such as test-cli, Keycloak automatically generates a User named service-account-test-cli. What is the purpose of this service, and why is it created?
In Keycloak, when you create a client with the Service Accounts Enabled option selected, it automatically generates a special user account named service-account-<client-id>. This service account is primarily for client-to-client or server-to-server communication where the client application itself (rather than a human user) needs access to resources in Keycloak.
Here’s how this service account works and why it’s useful:
Purpose and Functionality
Client Credentials Flow: The service account allows applications to authenticate directly with Keycloak using the client’s credentials (client ID and client secret) in what is known as the Client Credentials Grant flow. This flow is part of the OAuth 2.0 protocol and is intended for backend applications or services where no end-user interaction is required.
Token Acquisition: Using the client’s credentials, Keycloak can generate access tokens for the service account, allowing it to access protected resources or APIs in Keycloak or other integrated services on behalf of the client itself. This setup is common for microservices, background jobs, or APIs where a client needs to call another service securely.
Role-Based Access Control: The service account has its own roles and permissions, which you can configure in Keycloak. For example, you could assign roles to service-account-node-app to give it access to certain API endpoints or admin resources, ensuring it has only the permissions it needs.
Example Use Case
Suppose node-app needs to access another backend service that requires authentication via Keycloak tokens. Using the service account, node-app can request an access token directly from Keycloak without requiring a user to log in interactively. With the access token, it can then make authenticated requests to the other service.
How to Use the Service Account in Code
To use this in code, you would typically:
Use the client’s ID and secret to request a token from Keycloak’s Token Endpoint.
Add the acquired token to your API requests’ authorization headers, which Keycloak can validate, enabling secure access to the necessary resources.
This setup provides a secure, standardized method for backend services to authenticate and interact with each other without exposing sensitive information or requiring user intervention.
Credits & References
A deep dive into Keycloak by Stian Thorgersen
OAuth Grant Types by oauth.net
OAuth 2.0 Simplified by Aaron Parecki
Keycloak Quickstarts by mposolda
Why OAuth API Keys and Secrets Aren’t Safe in Mobile Apps by Aaron Parecki
The Little Book of OAuth 2.0 RFCs by Aaron Parecki
OAuth: When Things Go Wrong by Aaron Parecki
OAuth 2.0 access tokens explained by Aaron Parecki
Understanding the concepts of access control [The Confused Developer] by OktaDev
Adding Salt to Hashing: A Better Way to Store Passwords by OktaDev
git tag -a v0 -m "https://medium.com/jungletronics/keycloak-identity-provider-192ffd9a00ae" -m "0- Execute docker command to run keycloak;" -m "1- Point your browser to http://localhost:8080;" -m "2- Node App Installation Guide;" -m "3 & 4- Start by introducing yourself and getting acquainted about code;" -m "5-  Access keycloak Application on http://localhost:8080/;" -m "6- In vscode, Explore app.js file;" -m "7- On Keycloak, create a client test-cli;" -m "8- Start your node App v0;" -m "9-  Testing endpoints in browser;" -m "10- Create 2 new roles - user & admin;" -m "11- Create Users, Set Credentials, and Assign Roles;" -m "12- Open Postman and import this json keycloack file;" -m "13 to 16- Postman use;" -m "17- Newman use;" -m "Thank you for downloading this project 😍️"

git push origin v0
👉Download v0 zip file here.

